
Android 9.0 Pie AOSP ROM is now available for Asus Zenfone Max Pro M1. In this custom ROM installation post, we will guide you through out each step in this post to download and install Android Pie 9.0 ROM AOSP ROM on Asus Zenfone Max Pro M1.
Zenfone Max Pro M1 is a new device mid ranger released by Asus a few months back in April 2018. The box opened device runs Android 8.1 Oreo with Asus specific features, but if you are a fan of stock Android UI with latest version of Android then here is a great chance to do that.
The Android Pie ROM for Asus Zenfone Max Pro M1 is pretty stable and most of the features are working flawlessly, if you are interested to flash Android Pie ROM on Zenfone Max Pro M1 then just follow the instructions below to download and install Android Pie AOSP ROM on Asus Zenfone Max Pro M1.
![]()
Features of the ROM:
Once you install the Android 9.0 Pie on your device, you’ll be able to access the Swipe Gesture navigation, Rotation suggestion, Adaptive Battery and Adaptive Brightness. Other goodies include Smart replies, Text selection, App actions, Redesigned Quick Setting tiles and Notification Panel, Redesigned Volume Options and lot more.
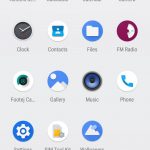
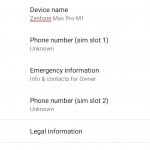
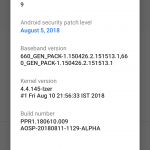
Note: Check the official XDA page to see more details about the ROM. Below are the screenshots from the ROM.


Download Android 9.0 Pie AOSP ROM for Asus Zenfone Max Pro M1
Bootloader on your device must be unlocked.
Once done with the bootloader unlock, download TWRP recovery for Asus Zenfone Max Pro M1 here and then for the flashing process follow instruction over here.
Now it seems you are all set for the installation process.
Downloads:
First download the Android Pie AOSP ROM for Asus Zenfone Max Pro M1. Link (Not flashable zip, extract zip & flash images individually)
Download Android Pie GApps: gapps-arm64-9.0-micro.zip
Download PR1 Vendor Image: vendor+boot_not_flashable_PR1.zip
Process to install Android 9.0 Pie AOSP ROM on Asus Zenfone Max Pro M1
Note: The process to install this ROM on your device is not simply done by flashing zip file just like we have been doing usually. But you need to extract the ROM zip and other necessary file to get the .image format, then flash each image file individually.
We recommend you to make a Nandroid back up before heading to the installation process. Here is the guide to make a nandroid backup it right away.
Extract the above downloaded ‘AOSP_X00TD-9.0-20180811-ALPHA.zip’ and ‘vendor+boot_not_flashable_PR1.zip’.
You will get the following files in seperate folders like shown below.
AOSP_X00TD-9.0-20180811-ALPHA-boot.img
AOSP_X00TD-9.0-20180811-ALPHA-system.img
vendor.img
Connect your phone to PC and transfer the extracted .img file on the storage of the device.
Disconnect your phone from PC and boot it into TWRP recovery menu.
Now tap on Wipe > Advanced Wipe > choose Cache, Dalvik/ART cache, System, Vendor and Data partition. Now confirm the process.
Now choose Install and this time choose ‘Install image’ option located at the bottom of the screen.
Choose AOSP_X00TD-9.0-20180811-ALPHA-boot.img to install first and then choose AOSP_X00TD-9.0-20180811-ALPHA-system.img and finally flash the vendor.img using the same process.
Once done with above process completely, simply reboot your device.
That’s it! Enjoy the latest OS update on your device. If you have any query feel free to contact us right away by just typing your comment in the section provided below.
Source XDA