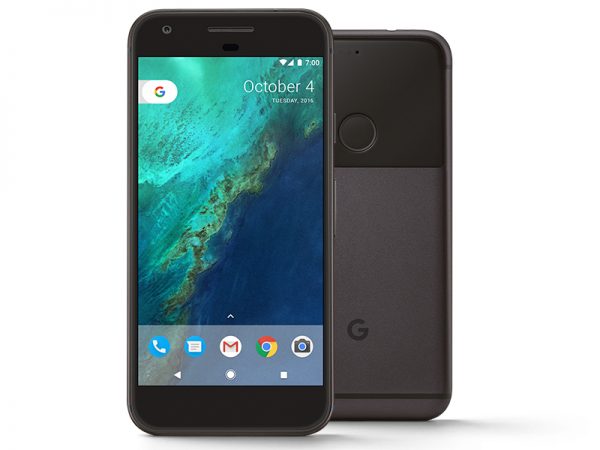
Today we are here with the process to unlock bootloader on all Nexus and Pixel phones. The bootloader unlock process on all Pixel and Nexus devices is relatively same except carrier locked devices. If own any Nexus device or Pixel device and want to unlock bootloader on it, then you are reading the right post. Just follow the instruction to see, how to unlock bootloader on all Nexus and Pixel phones.
Why Bootloader Unlock it required?
Unlocking Bootloader on any device enables the world of possibilities on your device. Once you unlock bootloader on your Nexus or Pixel phone, you can flash factory images on your device, install custom Recovery to flash custom ROMs, mods and other tweaking stuff on your device. The most common reason to unlock bootloader on any device is to get root access on any device, once a device is rooted you can perform all the above mentioned tasks easily.
As long as any Nexus or Pixel device is concerned, these are development friendly devices which means you can easily unlock bootloader on them. Most of the OEMs gives you access to bootloader unlock however it is not always recommended because once the bootloader is unlocked on any device it’s warranty is expired and your data is also wiped during the process. However if you think you are OK with that, then just follow the steps below to unlock bootloader on Nexus and Pixel devices.
How to unlock bootloader on Google Pixel, Pixel 2 and Nexus
Before you begin:
- Install latest USB drivers for Google Pixel/Nexus on PC. Download right away
- Set up Adb and fastboot drivers on PC, follow this guide to see the process.
- Enable ‘USB debugging’ and ‘OEM Unlock’ option from Settings > Developer options.
- Sometimes you need to activate the Developers option in Settings menu. To do so, go to About phone and tap the Build Number 7 times.
- As we told you above that bootloader unlock process will completely wipe your data, so we recommend you to create a backup of important data from device to PC to restore it later after bootloader unlocking.
- Your device must contain at least 60% charge.
- A working USB cord will be required.
If you think you are all set, just go ahead follow the instructions to unlock bootloader on Nexus/Pixel device.
If you own a Verizon branded Pixel devices, then follow this guide to unlock bootloader on Verizon Pixel 2 and Pixel XL.
Steps to unlock bootloader on all Nexus and Pixel devices

Step 1: Open the directory where you have installed the adb and fastboot drivers, search for the folder named ‘ADB’ in there. Now open the folder and you’ll see four files including ADB and fastboot.exe(as shown).
Step 2: Connect your device to PC using USB data cable and let the drivers installed completely.

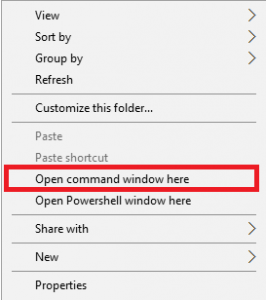
Step 3: Now press and hold Shift key and right mouse click any empty space in the same folder and choose ‘Open command window here'(as shown above).
Step 4: Now you need your device to boot into fastboot/bootloader mode, to do this enter the following command in the command window.
adb reboot bootloader
Step 5: Once your phone boots into fastboot mode, issue the following command to unlock it’s bootloader.
fastboot flashing unlock
Now you will find bootloader unlock option on your device, confirm the process and you are done.
The bootloader on your device should be unlocked, if you have changed your mind and want to re-lock it then it is also possible, just follow the re-lock section below.
How to relock bootloader
Now if you have changed your mind and want to relock bootloader, just issue the following command.
fastboot flashing lock
It will ask you to relock bootloader, highlight the ‘Yes’ option using volume keys and press power key to confirm.
That’s all about unlocking bootloader on Nexus and Pixel devices. If this guide helped you don’t forget to share it with your friends and spread happiness.
