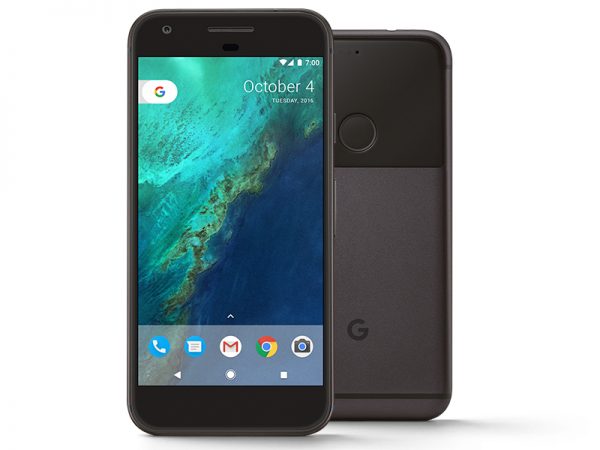
Google has just released February 2019 security patch for it’s first, second and third generation Pixel devices. The update went live earlier today, this time the update is available to download as build PQ2A.190205.001 for Pixel 3 and Pixel 3 XL, Pixel 2 / Pixel 2 XL get PQ2A.190205.002, and 2016 Google Pixel / Pixel XL gets PQ2A.190205.003 build. The new Android 9.0 Pie based update brings multiple fixes and improvements in various department of the system. You will find February 2019 security bulletin for Pixel here. February 2019 update for Pixel devices is live via OTA (Over The Air) but if you are getting impatient to manually install the update on your device then we have got you covered.
We have also posted the link to download the factory images as well as OTA file for your ease. Each one has different installation process just follow the one you find suitable for your device. Just read more to download February 2019 PQ2A.190205.001/PQ2A.190205.002/PQ2A.190205.003 update for Pixel devices.
Note: Pixel C is receiving the update as build OPM8.190205.001, that is based on Android Oreo. Download link also available to get the factory image / OTA for the device.
Download PQ2A.190205.001/002/003 February 2019 OTA/Factory images for Pixel devices
Here are the direct download link for the update. Just download the one that is specified for the your device.
Download PQ2A.190205.003 for first Generation Pixel devices.
- Pixel: Factory Image — OTA
- Pixel XL: Factory Image — OTA
Download PQ2A.190205.002 for second Generation Pixel devices.
- Pixel 2: Factory Image — OTA
- Pixel 2 XL: Factory Image — OTA
Download PQ2A.190205.001 for third Generation Pixel devices.
- Pixel 3: Factory Image — OTA
- Pixel 3 XL: Factory Image — OTA
Download OPM8.190105.002 for Pixel C
Pixel C: Factory Image — OTA
How to install February 2019 OTA on Pixel devices
Pre-requisite:
A working USB data cable is required.
Set up adb and fastboot drivers on PC, Here we have a guide to do that.
Download the OTA image for your device and move it to the internal storage of your device
Steps to install OTA via adb sideload

Step 1: Now open the directory where you have installed the adb and fastboot drivers, search for the folder named ‘ADB’ in there. Once you find it open it and you’ll see four files including ADB and fastboot.exe(as shown).
Step 2: Now connect your device to PC using USB data cable and let the drivers installed completely.

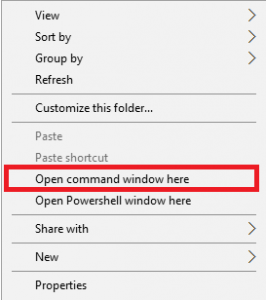
Step 3: Now press and hold Shift key and right mouse click any empty space in the adb folder and choose ‘Open command window here'(as shown above).
Step 4: Boot your phone into recovery mode, to do this enter the following command in the command window.
adb reboot recovery
Step 5: Once in recovery mode, choose the option “Apply update from ADB”
Step 6: Sideload the OTA with the following command
adb sideload <OTA_image.zip>
That was all about the OTA flashing, now head to the section below to learn the process to install factory image on any Google device.
Factory Image installation process:
To install the factory images, the bootloader on your device must be unlocked.
If you own Pixel 2 and Pixel 2 XL then follow this guide to unlock it right away | Pixel 3/3XL owners should follow this guide to unlock bootloader.
Step 1: Download the factory image for your device from the links above.
Step 2: Extract the factory image zip on your PC
Step 3: Run the flash-all.bat file on windows PC.
Step 4: If you are on Mac/Linux then run the file flash-all.sh.
Wait for the process to complete.
That’s it! If you find any difficulty in the update process let us know, and stay tuned with GadgetsTwist.Com for more updates.
